
Choosing the right photos for your personalised items
- Steph Marlow

- Sep 27, 2019
- 3 min read
Updated: Jan 22, 2022
So you've found the perfect personalised product, the promotional photos look amazing and you can't wait to receive your items, so you dig out a photo and send it across and wait patiently for your delivery to arrive. But when it does, the final product just doesn't have the same impact as the product images you saw online, and you can't put your finger on why.
In the majority of cases your disappointment in the finished personalised goods will come down to the photo you have selected; choosing the correct photo will have a massive impact on the final quality of your item so it's important to spend some time getting it right.
There are 4 main things you should focus on when choosing the right photo for your personalised items:
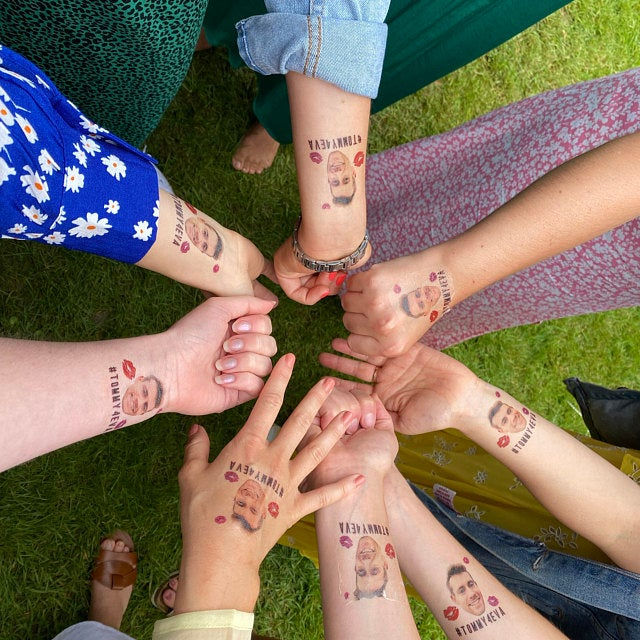
1) Particularly for items where the background is to be edited out (including our personalised photo temporary tattoos), you will need to ensure the whole head of the subject (including the hair) is visible in the photo. If you have part of the head cropped out of the photo it will make it a lot harder to work with and will leave an odd shaped head once the background has been removed - straight edges and square heads just don't look all that great!
2) Make sure the subject of the photo is close to the forefront of your picture, this will ensure that when the image is enlarged to fit on your product and display the person clearly the quality will still remain. If you are having the enlarge photos too much then you will lose a lot of the quality and end up with a very grainy photo.
3) Where possible, try and use a photo that has been taken on a digital camera rather than a phone camera. That being said, as phone cameras are improving this is becoming less of an issue. It will just come down to what phone the photo was taken on originally, for example a photo taken on an iPhone 4 will be pretty poor quality compared to a photo taken on the iPhone X.
4) Lastly, a photo taken with good lighting is really beneficial in making sure your photo really 'pops' on your personalised product. Whilst we are able to offer free editing of your photos on our personalised temporary tattoos to change things like the brightness and contrast, most companies do not offer this as part of their service. Also, even if your photos can be edited, changing the brightness can cause your photo to lose some of the detail, particularly on a photo that isn't the best image quality to begin with.
So there you have it, your 4 simple steps to choosing the perfect photos for personalised products. When it comes to choosing the perfect photo, it really is beneficial to spend some time searching for the right image if you want maximum satisfaction from the finished product. Sometimes you can get away with a photo that isn't necessarily the best quality if your photo has the fun factor, but for anything else it will pay off if you select the right image.
TOP TIP: You should always request to see a mock-up of your design before it is printed, this way you can intervene if the photo you originally chose just doesn't work as well as you had hoped for your item.
Take a look at our personalised temporary tattoo products complete with your very own photos!


Comments